OpenStack Elections 2015: Go Vote!

Every time I am involved in something related to OpenStack, it is amazing to see how great the OpenStack community is. Today is a second day of OpenStack elections, and it is very exciting to be part of it. Over the last couple days I had people that do not know me in person write to me, talk to me at work, and show their support in other ways.

Check out my candidate profile here: http://www.openstack.org/community/members/profile/3106

I know the OpenStack community is very active, however, this time we are asked to be even more involved than usual: not only do you need to vote, you need to make sure that your friends and colleges do not forget to vote as well.

HOW TO VOTE: If you are an eligible voter, you should have received an email with the subject “OpenStack Foundation – 2015 Individual Director Election”from secretary@openstack.org. This email includes your unique voting link. If you did not receive an email, please contact secretary@openstack.org.

Vote for Egle!

See all the candidates running for the elections: http://www.openstack.org/election/2015-individual-director-election/CandidateList

-eglute

Devstack with Ironic and Heat

It took me several re-stacks, but I finally got a working devstack with Ironic and Heat services running. I mostly followed directions here, but I ended up making a few changes in the local.conf file.

Start with cloning the repo and creating the stack user:

$ git clone https://github.com/openstack-dev/devstack.git devstack
$ sudo ./devstack/tools/create-stack-user.sh 

Now, switch to the ‘stack’ user and clone again:

$ sudo su stack
$ cd ~
$ git clone https://github.com/openstack-dev/devstack.git devstack
$ cd devstack

Create local.conf file in devstack directory:

[[local|localrc]]

# Credentials
DATABASE_PASSWORD=secrete
ADMIN_PASSWORD=secrete
SERVICE_PASSWORD=secrete
SERVICE_TOKEN=secrete
RABBIT_PASSWORD=secrete

# Enable Ironic API and Ironic Conductor
enable_service ironic
enable_service ir-api
enable_service ir-cond

# Enable Neutron which is required by Ironic and disable nova-network.
ENABLED_SERVICES=rabbit,mysql,key
ENABLED_SERVICES+=,n-api,n-crt,n-obj,n-cpu,n-cond,n-sch,n-novnc,n-cauth
ENABLED_SERVICES+=,neutron,q-svc,q-agt,q-dhcp,q-l3,q-meta,q-lbaas
ENABLED_SERVICES+=,g-api,g-reg
ENABLED_SERVICES+=,cinder,c-api,c-vol,c-sch,c-bak
ENABLED_SERVICES+=,ironic,ir-api,ir-cond
ENABLED_SERVICES+=,heat,h-api,h-api-cfn,h-api-cw,h-eng
ENABLED_SERVICES+=,horizon

# Create 3 virtual machines to pose as Ironic's baremetal nodes.
IRONIC_VM_COUNT=3
IRONIC_VM_SSH_PORT=22
IRONIC_BAREMETAL_BASIC_OPS=True

# The parameters below represent the minimum possible values to create
# functional nodes.
IRONIC_VM_SPECS_RAM=1024
IRONIC_VM_SPECS_DISK=10

# Size of the ephemeral partition in GB. Use 0 for no ephemeral partition.
IRONIC_VM_EPHEMERAL_DISK=0

VIRT_DRIVER=ironic

# By default, DevStack creates a 10.0.0.0/24 network for instances.
# If this overlaps with the hosts network, you may adjust with the
# following.
NETWORK_GATEWAY=10.1.0.1
FIXED_RANGE=10.1.0.0/24
FIXED_NETWORK_SIZE=256

# Log all output to files
LOGFILE=$HOME/devstack.log
SCREEN_LOGDIR=$HOME/logs
IRONIC_VM_LOG_DIR=$HOME/ironic-bm-logs

Now your devstack is ready for setup, simply run

./stack.sh

After devstack finishes running, you should see something similar to:

Horizon is now available at http://10.0.0.1/
Keystone is serving at http://10.0.0.1:5000/v2.0/
Examples on using novaclient command line is in exercise.sh
The default users are: admin and demo
The password: secrete
This is your host ip: 10.0.0.1

Source the credentials for the demo user:

$ source ~/devstack/openrc

Create ssh key:

$ nova keypair-add test > test.pem
chmod 600 test.pem

Check available flavors, note that baremetal is one of the flavors:

$ nova flavor-list
+-----+-----------+-----------+------+-----------+------+-------+-------------+-----------+
| ID  | Name      | Memory_MB | Disk | Ephemeral | Swap | VCPUs | RXTX_Factor | Is_Public |
+-----+-----------+-----------+------+-----------+------+-------+-------------+-----------+
| 1   | m1.tiny   | 512       | 1    | 0         |      | 1     | 1.0         | True      |
| 2   | m1.small  | 2048      | 20   | 0         |      | 1     | 1.0         | True      |
| 3   | m1.medium | 4096      | 40   | 0         |      | 2     | 1.0         | True      |
| 4   | m1.large  | 8192      | 80   | 0         |      | 4     | 1.0         | True      |
| 5   | m1.xlarge | 16384     | 160  | 0         |      | 8     | 1.0         | True      |
| 551 | baremetal | 1024      | 10   | 0         |      | 1     | 1.0         | True      |
+-----+-----------+-----------+------+-----------+------+-------+-------------+-----------+

Create first image using ironic:

$ image=$(nova image-list | egrep "$DEFAULT_IMAGE_NAME"'[^-]' | awk '{ print $2 }')

$ nova boot --flavor baremetal --image $image --key_name test my-first-metal
+--------------------------------------+----------------------------------------------------------------+
| Property                             | Value                                                          |
+--------------------------------------+----------------------------------------------------------------+
| OS-DCF:diskConfig                    | MANUAL                                                         |
| OS-EXT-AZ:availability_zone          | nova                                                           |
| OS-EXT-STS:power_state               | 0                                                              |
| OS-EXT-STS:task_state                | scheduling                                                     |
| OS-EXT-STS:vm_state                  | building                                                       |
| OS-SRV-USG:launched_at               | -                                                              |
| OS-SRV-USG:terminated_at             | -                                                              |
| accessIPv4                           |                                                                |
| accessIPv6                           |                                                                |
| adminPass                            | 99wcXpnQFkck                                                   |
| config_drive                         |                                                                |
| created                              | 2014-11-12T04:56:42Z                                           |
| flavor                               | baremetal (551)                                                |
| hostId                               |                                                                |
| id                                   | 53094f5d-5f48-4059-9547-9e297a5f324b                           |
| image                                | cirros-0.3.2-x86_64-uec (183b8227-10a0-4cf1-afd9-c4ff1272dc41) |
| key_name                             | test                                                           |
| metadata                             | {}                                                             |
| name                                 | my-first-metal                                                 |
| os-extended-volumes:volumes_attached | []                                                             |
| progress                             | 0                                                              |
| security_groups                      | default                                                        |
| status                               | BUILD                                                          |
| tenant_id                            | c6cf561507d2425480279f2209209b77                               |
| updated                              | 2014-11-12T04:56:43Z                                           |
| user_id                              | ad3318ff89014b7a8bbf6d589806e501                               |
+--------------------------------------+----------------------------------------------------------------+
stack@egle-node:~$ nova list
+--------------------------------------+----------------+--------+------------+-------------+------------------+
| ID                                   | Name           | Status | Task State | Power State | Networks         |
+--------------------------------------+----------------+--------+------------+-------------+------------------+
| 53094f5d-5f48-4059-9547-9e297a5f324b | my-first-metal | ACTIVE | -          | Running     | private=10.1.0.4 |
+--------------------------------------+----------------+--------+------------+-------------+------------------+

To see all the “bare metal” nodes and what is going on with them, use admin user:

. ~/devstack/openrc admin admin 

There were 3 “bare metal” nodes created for us using the local.conf file configuration. Since this is devstack, the nodes magically appeared for us thanks to virtualization magic.

Before any nodes are built, all the “bare metal” instances will be powered off and not provisioned. Remember to use admin user for all the ironic commands.

$ ironic node-list
+--------------------------------------+---------------+-------------+--------------------+-------------+
| UUID                                 | Instance UUID | Power State | Provisioning State | Maintenance |
+--------------------------------------+---------------+-------------+--------------------+-------------+
| 321122bf-a187-456b-9232-d34ec2279941 | None          | power off   | None               | False       |
| a636cb12-3491-4abb-91a1-05ebd7137e8a | None          | power off   | None               | False       |
| 1af459b4-ba3a-4356-8d7a-c2e7ce70a900 | None          | power off   | None               | False       |
+--------------------------------------+---------------+-------------+--------------------+-------------+

Once the instance above is booted, this will change, pay attention to the “Provisioning State” and “Power State”:

$ ironic node-list
+--------------------------------------+--------------------------------------+-------------+--------------------+-------------+
| UUID                                 | Instance UUID                        | Power State | Provisioning State | Maintenance |
+--------------------------------------+--------------------------------------+-------------+--------------------+-------------+
| 321122bf-a187-456b-9232-d34ec2279941 | 53094f5d-5f48-4059-9547-9e297a5f324b | power off   | deploying          | False       |
| a636cb12-3491-4abb-91a1-05ebd7137e8a | None                                 | power off   | None               | False       |
| 1af459b4-ba3a-4356-8d7a-c2e7ce70a900 | None                                 | power off   | None               | False       |
+--------------------------------------+--------------------------------------+-------------+--------------------+-------------+
stack@egle-node:~/devstack$ ironic node-list
+--------------------------------------+--------------------------------------+-------------+--------------------+-------------+
| UUID                                 | Instance UUID                        | Power State | Provisioning State | Maintenance |
+--------------------------------------+--------------------------------------+-------------+--------------------+-------------+
| 321122bf-a187-456b-9232-d34ec2279941 | 53094f5d-5f48-4059-9547-9e297a5f324b | power on    | wait call-back     | False       |
| a636cb12-3491-4abb-91a1-05ebd7137e8a | None                                 | power off   | None               | False       |
| 1af459b4-ba3a-4356-8d7a-c2e7ce70a900 | None                                 | power off   | None               | False       |
+--------------------------------------+--------------------------------------+-------------+--------------------+-------------+
$ ironic node-list
+--------------------------------------+--------------------------------------+-------------+--------------------+-------------+
| UUID                                 | Instance UUID                        | Power State | Provisioning State | Maintenance |
+--------------------------------------+--------------------------------------+-------------+--------------------+-------------+
| 321122bf-a187-456b-9232-d34ec2279941 | 53094f5d-5f48-4059-9547-9e297a5f324b | power on    | active             | False       |
| a636cb12-3491-4abb-91a1-05ebd7137e8a | None                                 | power off   | None               | False       |
| 1af459b4-ba3a-4356-8d7a-c2e7ce70a900 | None                                 | power off   | None               | False       |
+--------------------------------------+--------------------------------------+-------------+--------------------+-------------+

Remember to check official documentation for devstack + ironic: http://docs.openstack.org/developer/ironic/dev/dev-quickstart.html#deploying-ironic-with-devstack

Happy stacking!
-eglute

ZeroVM at OpenStack Paris

This week, I helped out with a ZeroVM workshop at OpenStack summit in Paris. I been following ZeroVM for a while, and I think it is one of projects that we will hear a lot more about this coming year.

What is ZeroVM? ZeroVM creates a secure and isolated execution environment which can run a single thread or application. ZeroCloud is middleware running on Swift. The combination of these three technologies enables running self contained code directly on the objects stored in Swift. This powerful combination can speed up data processing tremendously.

For a good introduction to ZeroVM, watch the presentation by Carina C. Zona: https://www.openstack.org/summit/openstack-paris-summit-2014/session-videos/presentation/converged-cloud-computing-that-and-39-s-secure-fast-or-cheap-pick-three

Getting started with ZeroVM is not hard, actually, it is very simple. Start by setting up a local environment with Swift and ZeroCloud setup using Vagrant: http://zerovm.readthedocs.org/zerocloud/devenv.html. Once you have the environment,  run the first few examples: http://zerovm.readthedocs.org/zerocloud/runningcode.html. This should give you a really great idea how to get started with ZeroVM and start writing your own code.

Watch our hands on tutorial at ZeroVM: https://www.openstack.org/summit/openstack-paris-summit-2014/session-videos/presentation/hands-on-with-zerovm.

-eglute

3D Printer First Impressions

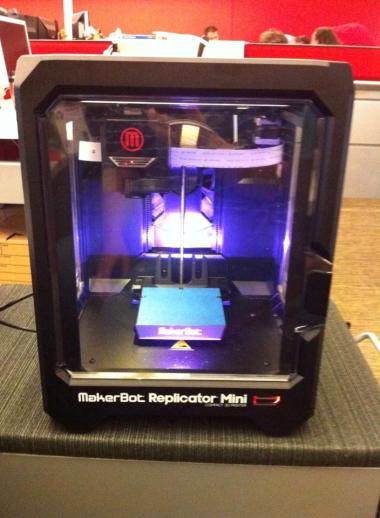
I was very fortunate to win a 3D printer, Makerbot Mini, at a developer conference. I think 3D printing technology is amazing, but never had a really good excuse to purchase one. Now, I don’t need excuses!

printer1

Here are my first impressions:

If you have a 3D printer at your desk at work, people will come and check it out. Best cubicle toy ever!

Assembling out of the box is fairly easy. After reading the less than helpful printed instructions, I combined them with a YouTube video and was able to stick parts into mostly the right places. Keep in mind, there were only 4 or so parts to put in place, no tools required.

After assembling the printer, I needed to download the software. I did through the usual install for macs, nothing fancy or tricky there. There appeared to be a few hiccups in the software, as it did not immediately detect the printer, and not immediately prompted me for my first print. Eventually, the software and the hardware were on the talking terms and now I was ready to print!

Being fairly technical, I assumed the instructions were not meant for me, so I tried printing without upgrading the firmware. The result was fairly obvious, the only thing to come out of it was frustrated audience patiently awaiting the first 3D thing. Do yourself a favor, read and follow the instructions- they were pretty clear that I needed to update the firmware. The software may prompt you for upgrade a bit too late, so be sure to cancel the print job and do the upgrade first.

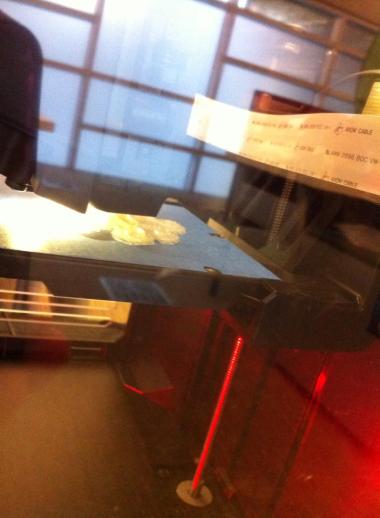
Upgrading the firmware took a while. After all was set in place, I loaded octopus sample file that came with the software and tried printing. After taking its sweet time warming, calibrating, targeting, and all the other things that printers do, it finally lifted the little plate to the nozzle and the nozzle started to frantically move back and forth trying to do something. While this was a lot better than before, the object it was printing was invisible. At this point, I cancelled the print, took out some parts and re-threaded the filament with a lot of force, instead of just a little (it really needs to go deep in there, not just a little). Feeling hopeful, tried again. Now, the printer could not find the bottom plate! The plate was obviously there, so i tried moving it. That did the trick, and when i pressed print again, it actually started printing! After warming, calibrating, targeting, etc, etc, etc.

printer2

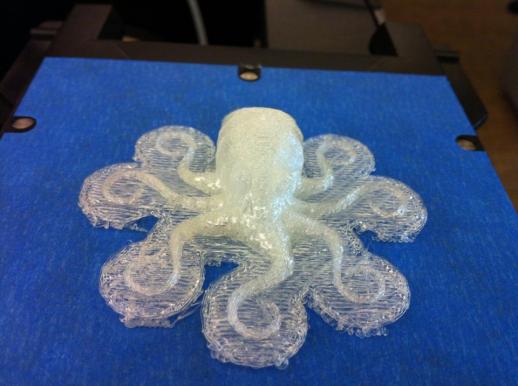
Now that the printer could correctly locate all its parts, it was chirping and humming and making other sweet printing sounds. It was making them for about 50 minutes, and in the end, I had a little plastic octopus, all of my own. I called him Nugget and gave it to my husband for safe keeping.

printer3

I still don’t have a good reason for a 3D printer, but I sure want to be printing things with it, and I keep thinking of all the things I can make!

If you would like your very own 3D Makerbot Mini, you can get it here.

-eglute

OSCON OpenStack Workshop Commands

Hello OSCON! Here are the workshop commands:

cat ~/credentials/user
source ~/credentials/user
keystone discover
keystone catalog
keystone endpoint-get –service volume
keystone token-get –wrap 50

nova list
nova flavor-list
nova boot –image cirros-qcow2 –flavor 1 MyFirstInstance
nova show MyFirstInstance
nova console-log MyFirstInstance

neutron net-create private
neutron subnet-create –name private-subnet private 10.0.0.0/29
neutron net-list
neutron subnet-list
neutron net-show private
neutron subnet-show private-subnet

nova boot –flavor –image –nic net-id=
NIC=c314b394-462d-4b62-b733-8e627c32943c
nova boot –image cirros-qcow2 –flavor 1 –nic net-id=$NIC MySecondInstance

sudo ip netns exec qdhcp-$NIC ip a
sudo ip netns exec qdhcp-$NIC ping 10.0.0.2

nova secgroup-list-rules default
nova secgroup-add-rule

nova secgroup-add-rule default icmp -1 -1 0.0.0.0/0
nova secgroup-add-rule default tcp 22 22 0.0.0.0/0

nova secgroup-create my_group “allow ping and ssh”
nova secgroup-add-rule my_group icmp -1 -1 0.0.0.0/0
nova secgroup-add-rule my_group tcp 22 22 0.0.0.0/0
nova add-secgroup MySecondInstance my_group

glance image-list
glance image-create –name “my_cirros_qcow2” –disk-format qcow2 –container-format bare –is-public False –file ~/images/cirros-0.3.2-x86_64-disk.img
glance image-show my_cirros_qcow2

cinder list
cinder type-list
cinder create 1 –display-name MyFirstVolume –volume-type SATA
nova boot –image cirros-qcow2 –flavor m1.tiny –nic net-id=$NIC MyVolumeInstance
VOLUME_ID=fc3f0bca-c59d-426d-84f5-1f614e3e9907
nova volume-attach MyVolumeInstance $VOLUME_ID auto
nova console-log MyVolumeInstance
sudo ip netns exec qdhcp-$NIC ssh cirros@10.0.0.4

if there is time, on instance:
sudo fdisk -l
sudo mkfs.ext3 /dev/vdb
sudo mkdir /extraspace
sudo mount /dev/vdb /extraspace
sudo touch /extraspace/helloworld.txt
sudo ls /extraspace
sudo umount /extraspace

nova volume-detach MyVolumeInstance $VOLUME_ID

source credentials/admin

swift stat
swift list
swift post mycontainer
echo “Hello OSCON!” > test.txt
swift upload mycontainer test.txt
swift download mycontainer test.txt -o –
swift stat mycontainer
swift list mycontainer

OSCON 2014 OpenStack Workshop

We are very excited to be doing a workshop at OSCON this year! http://www.oscon.com/oscon2014/public/schedule/detail/34824
“Curious about OpenStack, but don’t know where to start? In this hands on tutorial we will walk you through the basics of OpenStack, the OpenSource cloud computing platform that is used to build private and public clouds.”

Since this is a hands-on lab, we have a virtual appliance with all-in-one OpenStack ready to go. This workshop is best for people that have no prior experience with OpenStack, but we won’t turn anyone away! Cody put all the materials online for download, so check them out! http://openstack.prov12n.com/oscon-lab-materials/

Bonus of doing a workshop at the beginning of the conference is that we will get to enjoy all the other workshops and talks, instead of worrying about ours!

Check out all the racker talks this year at OSCON: http://www.rackspace.com/blog/at-oscon-rackers-will-showcase-all-things-open-source/

-eglute

Using neutron-debug to create a probe

Last week I was troubleshooting neutron issues, and one of my colleagues showed me a new cool tool to help debug some issues.
Here is the link to the tool and its current documentation: https://github.com/openstack/neutron/tree/master/neutron/debug.

Basic usage:

Get a neutron network UUID:

neutron net-list

Add a probe to on the network:

neutron-debug --config-file <config file for l3 agent> probe-create <network UUID>
neutron-debug --config-file /etc/neutron/l3_agent.ini probe-create 81abae05-657d-4dc9-ad30-c42f5b7d0c75

List network namespaces:

$ ip netns
 qprobe-43d574f6-ee34-43d8-a3b4-4c7e686312cb
 qrouter-7f660048-332b-4d39-85f9-05b5854f64ad
 qdhcp-97eebde0-c20b-496a-a086-77c95b587291
 qdhcp-81abae05-657d-4dc9-ad30-c42f5b7d0c75

List probes:

neutron-debug --config-file /etc/neutron/l3_agent.ini probe-list

Use the newly created probe to ping all the things on the network (if it is not working, you need to update neutron-debug):

neutron-debug --config-file /etc/neutron/l3_agent.ini ping-all 43d574f6-ee34-43d8-a3b4-4c7e686312cb

Delete the probe:

neutron-debug --config-file /etc/neutron/l3_agent.ini probe-delete 43d574f6-ee34-43d8-a3b4-4c7e686312cb

Cleanup net spaces:

$ neutron-netns-cleanup --force --config-file=/etc/neutron/dhcp_agent.ini --config-file=/etc/neutron/neutron.conf
$ neutron-netns-cleanup --force --config-file=/etc/neutron/l3_agent.ini --config-file=/etc/neutron/neutron.conf

-eglute

OpenStack Command Line Cheat Sheet

OpenStack services have very powerful command line interfaces, with lots of different options.  I went looking for a good command line cheat sheet, and did not find many options, so decided to created one myself. This is not a replacement for reading excellent OpenStack documentation, rather, a short summary of some basic commands. Comments, corrections, suggestions are welcome!

OpenStack command line cheat sheet PDF version.

Keystone (Identity Service)

# List all users
keystone user-list

# List identity service catalog
keystone catalog

# Discover keystone endpoints
keystone discover

# List all services in service catalog
keystone service-list

# Create new user
keystone user-create --name --tenant-id --pass --email --enabled

# Create new tenant
keystone tenant-create --name --description --enabled

Nova (Compute Service)

# List instances, notice status of instance
nova list

# List images
nova image-list

# List flavors
nova flavor-list

# Boot an instance using flavor and image names (if names are unique)
nova boot --image --flavor
nova boot --image cirros-0.3.1-x86_64-uec --flavor m1.tiny MyFirstInstance

# Login to instance
ip netns
sudo ip netns exec ssh <user@server or use a key>
sudo ip netns exec qdhcp-6021a3b4-8587-4f9c-8064-0103885dfba2 ssh cirros@10.0.0.2

# if you are on devstack, password is “cubswin:)” without the quotes

# Show details of instance
nova show <name>
nova show MyFirstInstance

# View console log of instance
nova console-log MyFirstInstance

# Pause, suspend, stop, rescue, resize, rebuild, reboot an instance
# Pause
nova pause <name>
nova pause volumeTwoImage

# Unpause
nova unpause <name>

# Suspend
nova suspend <name>

# Unsuspend
nova resume <name>

# Stop
nova stop <name>

# Start
nova start <name>

# Rescue
nova rescue <name>

# Resize
nova resize <name> <flavor>
nova resize my-pem-server m1.small
nova resize-confirm server1

# Rebuild
nova rebuild <name> <image>
nova rebuild newtinny cirros-qcow2

# Reboot
nova reboot <name>
nova reboot newtinny

# Inject user data and files into an instance
nova boot --user-data ./userdata.txt MyUserdataInstance
nova boot --user-data userdata.txt --image cirros-qcow2 --flavor m1.tiny MyUserdataInstance2

# to validate file is there, ssh into instance, go to /var/lib/cloud look for file

# Inject a keypair into an instance and access the instance with that keypair
# Create keypair
nova keypair-add test > test.pem
chmod 600 test.pem

# Boot
nova boot --image cirros-0.3.0-x86_64 --flavor m1.small --key_name test my-first-server

# ssh into instance
sudo ip netns exec qdhcp-98f09f1e-64c4-4301-a897-5067ee6d544f ssh -i test.pem cirros@10.0.0.4

# Set metadata on an instance
nova meta volumeTwoImage set newmeta=’my meta data’

# Create an instance snapshot
nova image-create volumeTwoImage snapshotOfVolumeImage
nova image-show snapshotOfVolumeImage

# Manage security groups
# Add rules to default security group allowing ping and ssh between #instances in the default security group
nova secgroup-add-group-rule default default icmp -1 -1
nova secgroup-add-group-rule default default tcp 22 22

Glance (Image Service)

# List images you can access
glance image-list

# Delete specified image
glance image-delete <image>

# Describe a specific image
glance image-show <image>

# update image
glance image-update <image>

# Manage images
# Kernel image
glance image-create --name “cirros-threepart-kernel” --disk-format aki --container-format aki --is-public True --file ~/images/cirros-0.3.1~pre4-x86_64-vmlinuz

# Ram image
glance image-create—name “cirros-threepart-ramdisk” --disk-format ari --container-format ari --is-public True --file ~/images/cirros-0.3.1~pre4-x86_64-initrd

# 3-part image
glance image-create—name “cirros-threepart” --disk-format ami --container-format ami --is-public True --property kernel_id=$KID—property ramdisk_id=$RID --file ~/images/cirros-0.3.1~pre4-x86_64-blank.img

# Register raw image
glance image-create --name “cirros-qcow2” --disk-format qcow2 --container-format bare --is-public True --file ~/images/cirros-0.3.1~pre4-x86_64-disk.img

Neutron (Networking Service)

# Create network
neutron net-create <name>
neutron net-create my-network

# Create a subnet
neutron subnet-create <network name> <cidr>
neutron subnet-create my-network 10.0.0.0/29

# List network and subnet
neutron net-list
neutron subnet-list

# Examine details of network and subnet
neutron net-show <id or name of network>
neutron subnet-show <id or name of subnet>

Cinder (Block Storage)

# Manage volumes and volume snapshots
# Create a new volume
cinder create <size in GB> --display-name
cinder create 1 --display-name MyFirstVolume

# Boot an instance and attach to volume
nova boot—image cirros-qcow2 --flavor m1.tiny MyVolumeInstance

# List volumes, notice status of volume
cinder list

# Attach volume to instance after instance is active, and volume is available
nova volume-attach <instance-id> <volume-id> auto
nova volume-attach MyVolumeInstance /dev/vdb auto

# Login into instance, list storage devices
sudo fdisk -l

# On the instance, make filesystem on volume
sudo mkfs.ext3 /dev/vdb

# Create a mountpoint
sudo mkdir /myspace

# Mount the volume at the mountpoint
sudo mount /dev/vdc /myspace

# Create a file on the volume
sudo touch /myspace/helloworld.txt
sudo ls /myspace

# Unmount the volume
sudo umount /myspace

Swift (Object Store)

# Displays information for the account, container, or object
swift stat
swift stat <account>
swift stat <container>
swift stat <object>

# List containers
swift list

# Create a container
swift post mycontainer

# Upload file to a container
swift upload <containder name> <file name>
swift upload mycontainer myfile.txt

# List objects in container
swift list container

# Download object from container
swift download <containder name> <file name>

# Upload with chunks, for large file
swift upload -S <size> <containder name> <file name>
swift upload -S 64 container largeFile

Happy stacking!

-eglute

Vagrant Up Razor-Server

If you want to play with the new razor-server version but don’t feel like installing all the bits by hand, try out a little vagrant script I wrote at https://github.com/eglute/razor-server-vagrant. So far, it has been tested with the WMware Fusion, and is somewhat of a work in progress. Keep in mind, that it takes a very long time to set it up, as it downloads, installs and configures the following bits:

curl
git
dnsmasq
postgresql
java
JRuby
TorqueBox
razor-client
razor microkernel
ubuntu server image

Once the vagrant is up and running, you will have a fully functional razor-server, setup with a policy and ready to install ubuntu server to the VMs attached to the newly created private network. The base policy will look for VMs with 1 processor.

The Vagrantfile comes with some IPs baked in. If you do not like the IPs I have picked, change them. Please take care that the IPs are in appropriate ranges.

config.vm.provision "shell", path: "provision.sh", :args =>"172.16.2.137 172.16.2.150 172.16.2.255"

First IP, or $IP_ADDRESS will be the IP of razor-server on the private network created. Note that it will be on eth1.

Second IP, or $IP_RANGE is going to be passed into dnsmasq configuration file for the DHCP range upper limit. The lower limit is the $IP_ADDRESS.

The third IP, or the $IP_BROADCAST is the IP used for broadcast in the ntp.conf. In this case, we have our own ntp server because in some cases you may really need accurate time.

So, check out the code. Then, add a vagrant box:

vagrant box add precise_fusion http://files.vagrantup.com/precise64_vmware.box

Once that is done, you are ready to do vagrant up:

vagrant up --provider=vmware_fusion

Now, go and have some coffee while vagrant does all the work for you!

Once vagrant is done with all the hard work, you can do

vagrant ssh
sudo su -
razor

and use razor commands. They will be a bit slow since razor client is using JRuby instead of a proper version of ruby (the author was cutting corners).

To install a new VM in VMware Fusion, create a new custom VM, add a new network device and specify the newly created vmnet (look for the latest vmnet2 or vmnet3). If all went well, your new VM will do a pxe boot off of a razor, and you will have a new node with Ubuntu server installed.

Happy vagranting and razoring!

-eglute